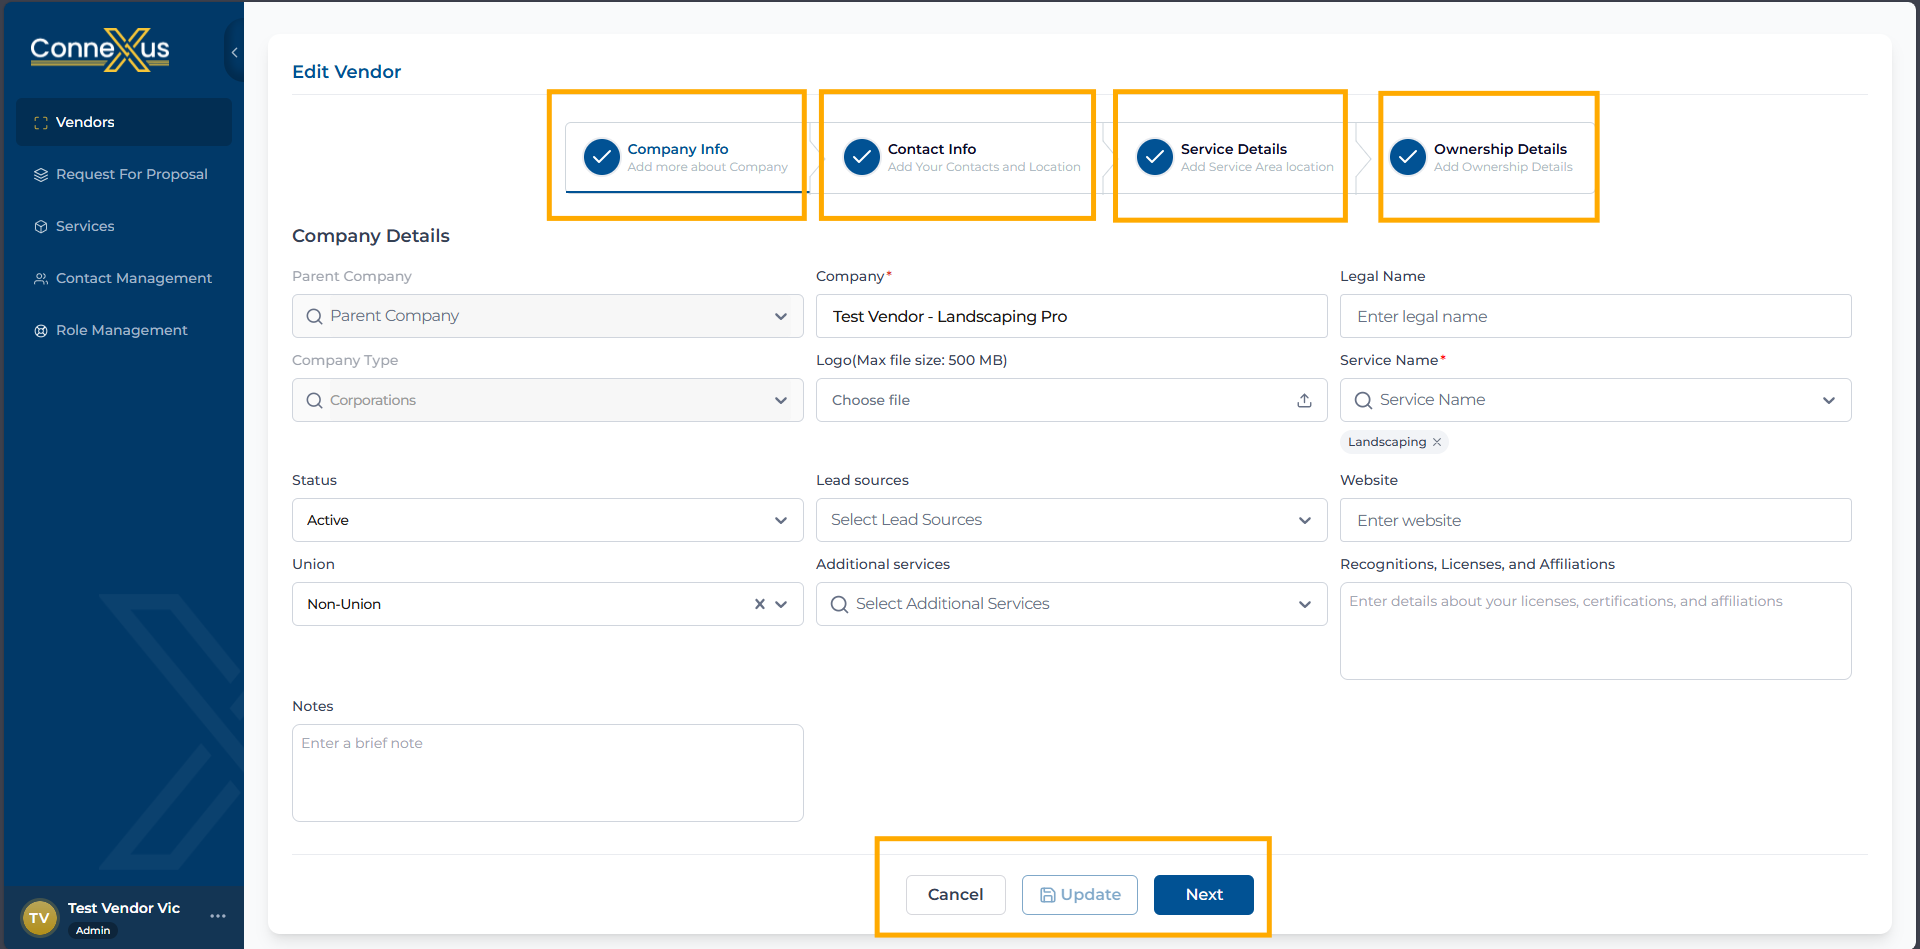
To update your vendor profile, click the pencil (edit) icon. This will open the Edit interface, which is organized into four sequential steps:
- Company Info: Manage core details like company name, type, and logo.
- Contact Info: Update primary contact persons and physical locations.
- Service Details: Adjust service categories and service area locations.
- Ownership Details: Provide information regarding the company's ownership structure.
Navigation Buttons:
- Moving Forward: Click the Next button at the bottom of the screen to save your current progress and advance to the next section.
- Saving Changes: Click the Update button at any time to save all changes and return to the main Vendor Module.
- Exiting: Click Cancel to discard any unsaved changes and exit the edit mode.
1. Company Details
On this page, you can update your company information, including
- Parent company, if applicable
- Company name
- Legal name
- Company type
- Company logo
- Services provided by your company
- Company website
- Union or non-union status
- Recognitions, licenses, and affiliations
2. Contact Info & Locations
In this section, you can manage the physical presence and primary representatives of the company.
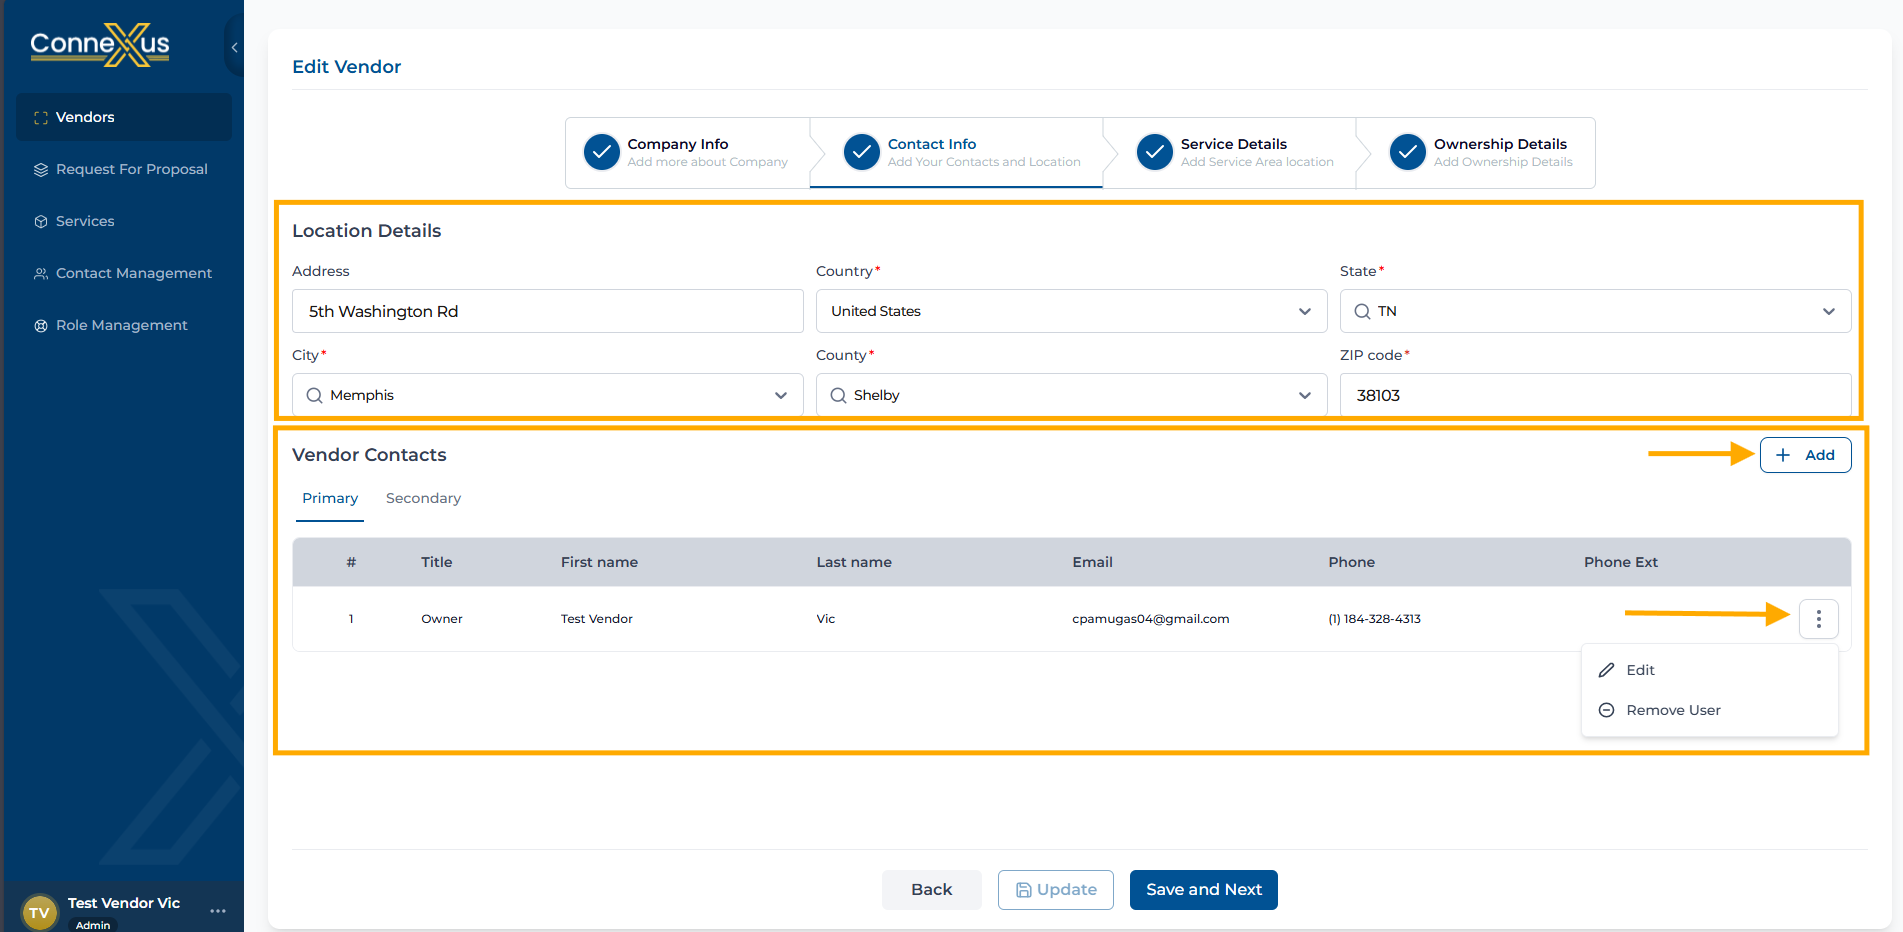
- Location Details: Update the physical address, including mandatory fields for Country, State, City, County, and ZIP code.
- Vendor Contacts:
- Switch between Primary and Secondary contact tabs.
- Add New Contact: Click the + Add button to include a new person.
- Manage Existing Contacts: Click the three-dot (Action) menu next to a contact to “Edit” their details or “Remove User”.
3. Service Details
Define where your services are offered to ensure you receive relevant work requests.
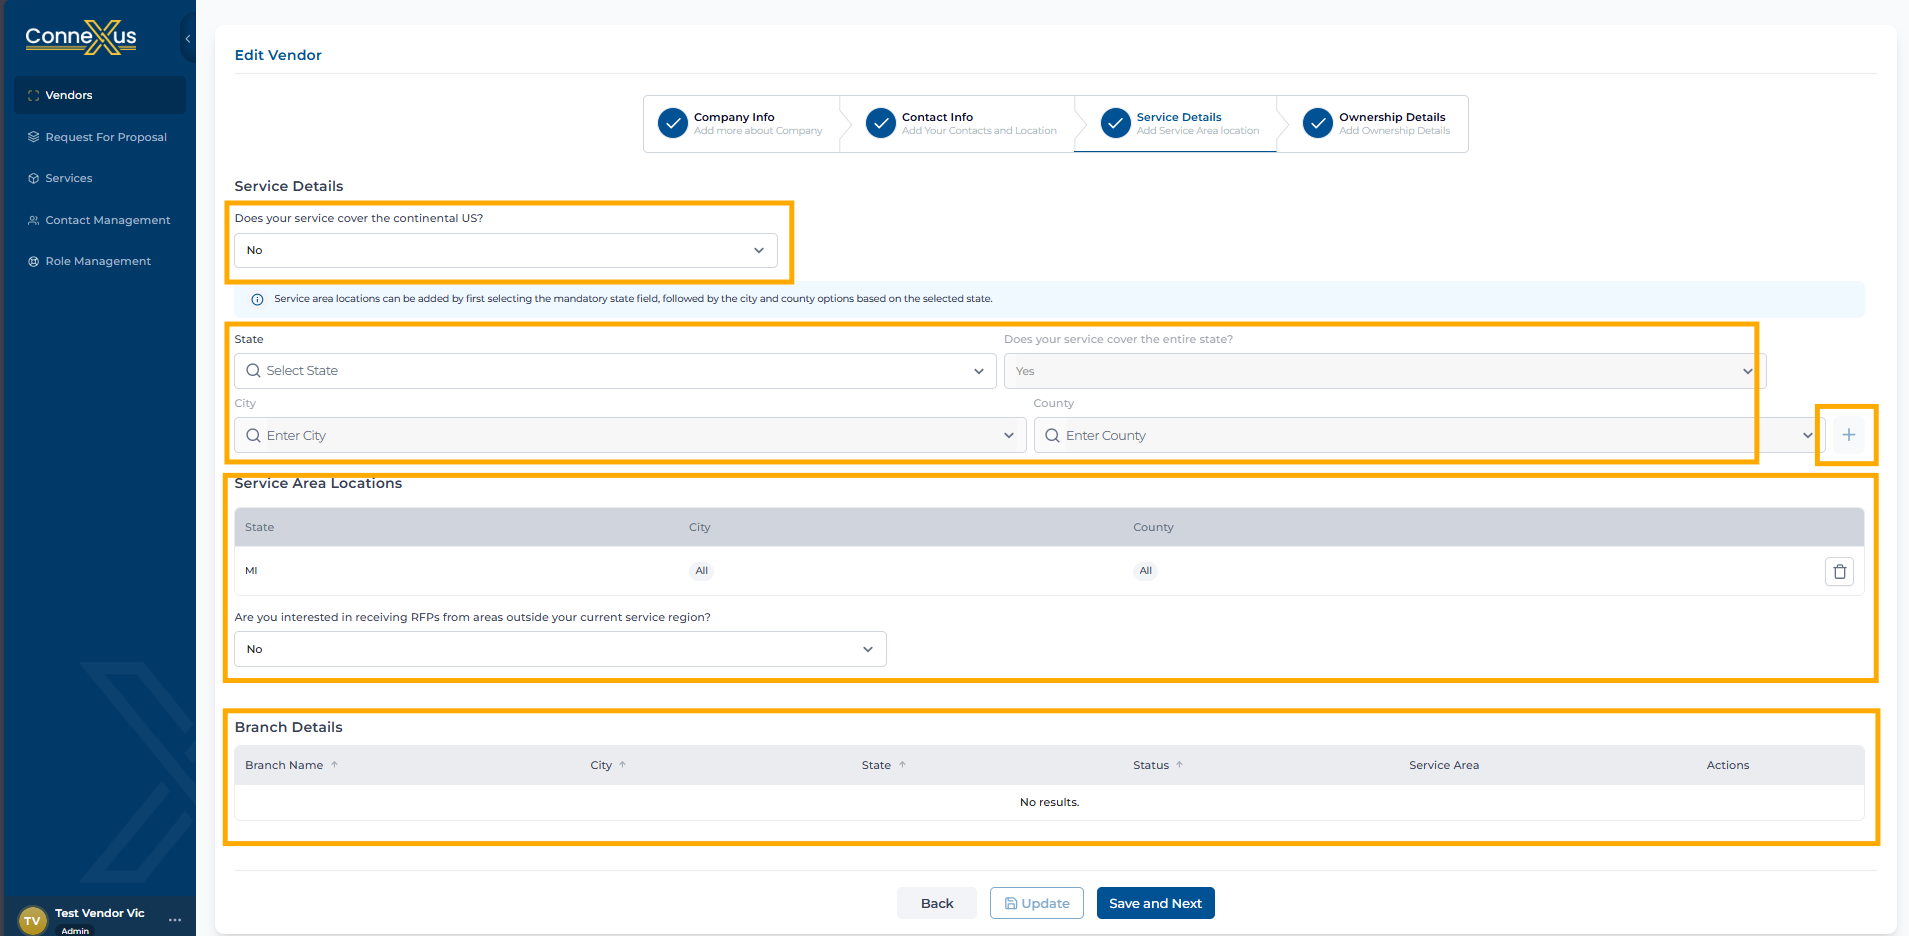
- Continental US Coverage: Select "Yes" if your business covers the entire country. If you select "No", you must manually define your specific service areas.
- Defining Service Areas:
- Select the State (mandatory).
- Select “All” or choose a City or County as applicable.
- Crucial: You must click the "+" icon on the far right to add the area to your list.
- Confirmed areas will then appear in the Service Area Locations table.
- Expanded RFPs: Use the dropdown to indicate if you are interested in receiving RFPs from areas outside your defined service region.
4. Ownership & Insurance Details - The final section covers legal, financial, and compliance information.
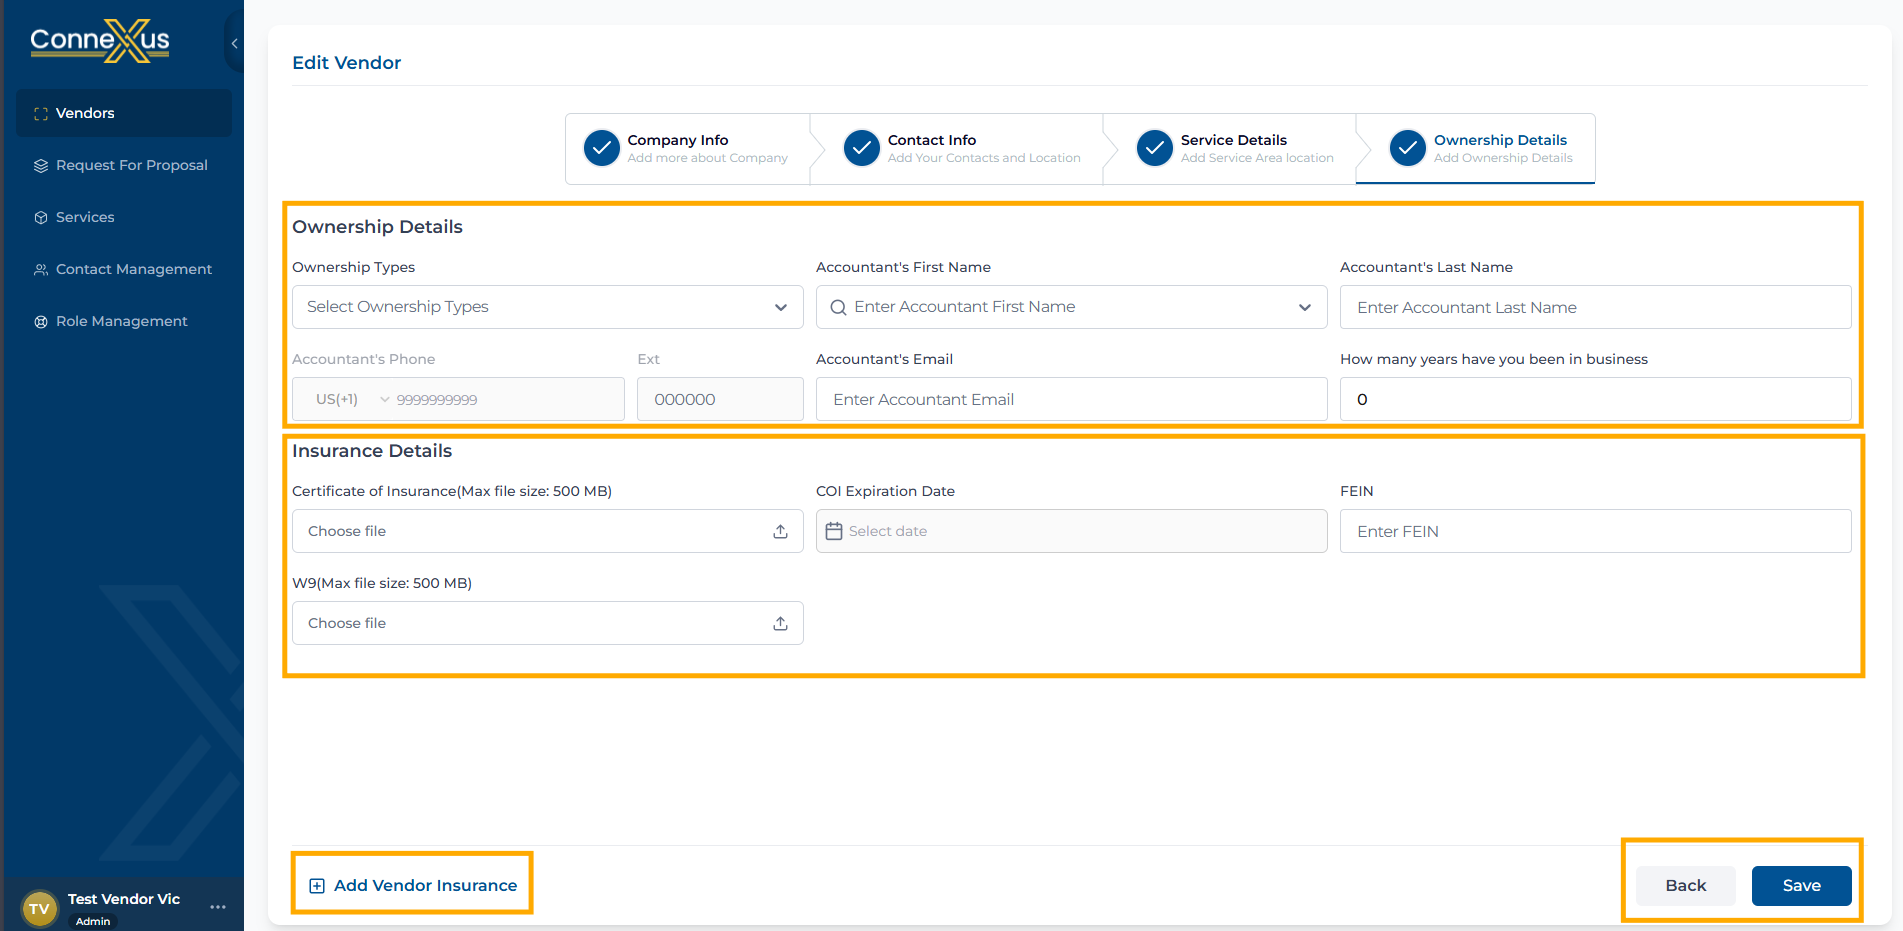
- Ownership Details: Select the Ownership Type and provide contact information for your company's Accountant.
- Insurance Details:
- Upload mandatory documents such as the Certificate of Insurance (COI) and W9.
- Enter the COI Expiration Date and your FEIN.
- Use the + Add Vendor Insurance button if you need to provide additional coverage details.
Was this article helpful?
That’s Great!
Thank you for your feedback
Sorry! We couldn't be helpful
Thank you for your feedback
Feedback sent
We appreciate your effort and will try to fix the article