Vendor Bid Submission
Bulk Acceptance & Bid Submission Guide
Effective as of August 2026
The Request For Proposal (RFP) module allows vendors to review project scopes, review property documentation, accept properties in bulk or individually, enter pricing, and submit only the ready properties. This guide covers the updated end-to-end flow from opening an RFP to submitting a formal bid.
1. Locating the RFP
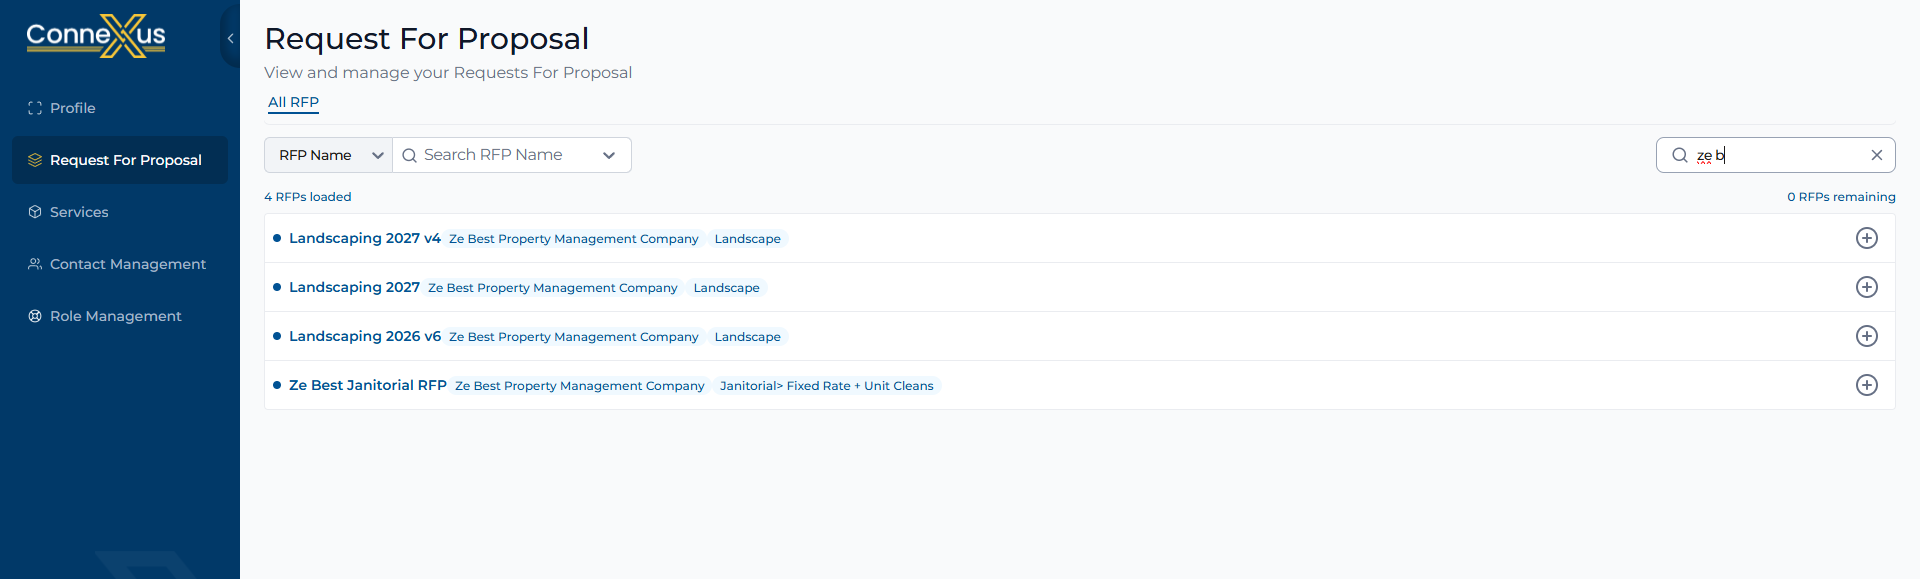
To view your current project invitations and active RFPs:
Select "Request For Proposal" from the left-hand navigation menu.
Browse or search your active invitations, then click the RFP title (e.g., Landscaping 2027) to open the project workspace.
2. Reviewing Project Specifications
Once inside the RFP workspace, you will find high-level details about the project scope.
RFP Details (marked 1)—review critical project data, including the RFP Due Date, Service, Contract Start Date, and Term of Contract.
Navigation: to view the individual properties included in this proposal, scroll past the summary box to the detailed properties table.
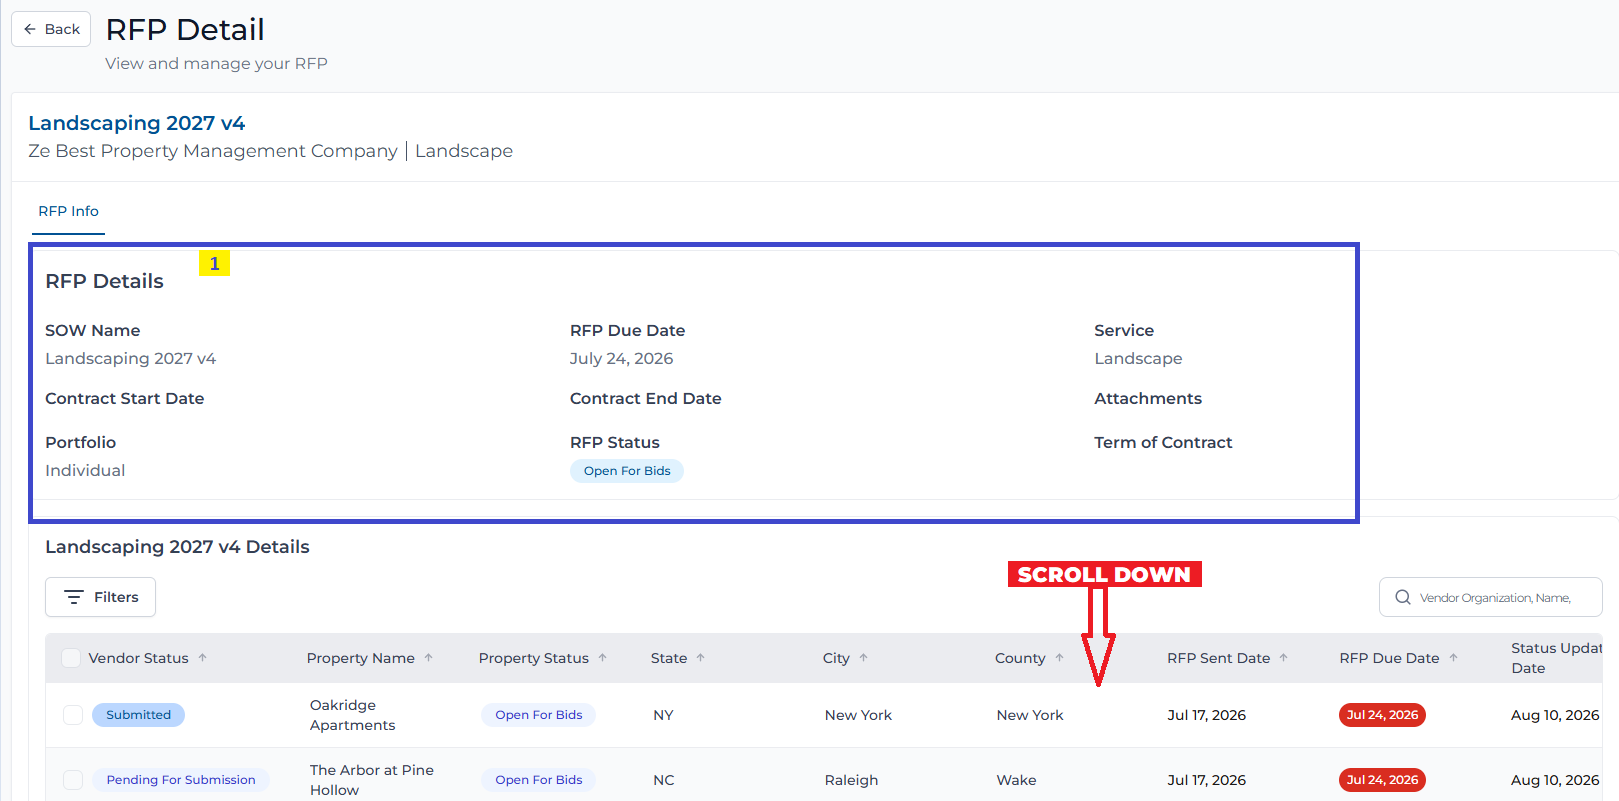
Review the RFP details, then scroll down to the properties table.
4. Selecting Properties to Accept
You can act on several properties at once from the RFP list.
Use the checkboxes in the Vendor Status column (marked 2) to select one or more properties individually or with the page-level select control. Move to another page if you need to add more.
Choose a bulk action at the top-right (marked 3): Accept RFPs to proceed or Reject RFPs to decline. The number badge shows how many properties the action applies to.
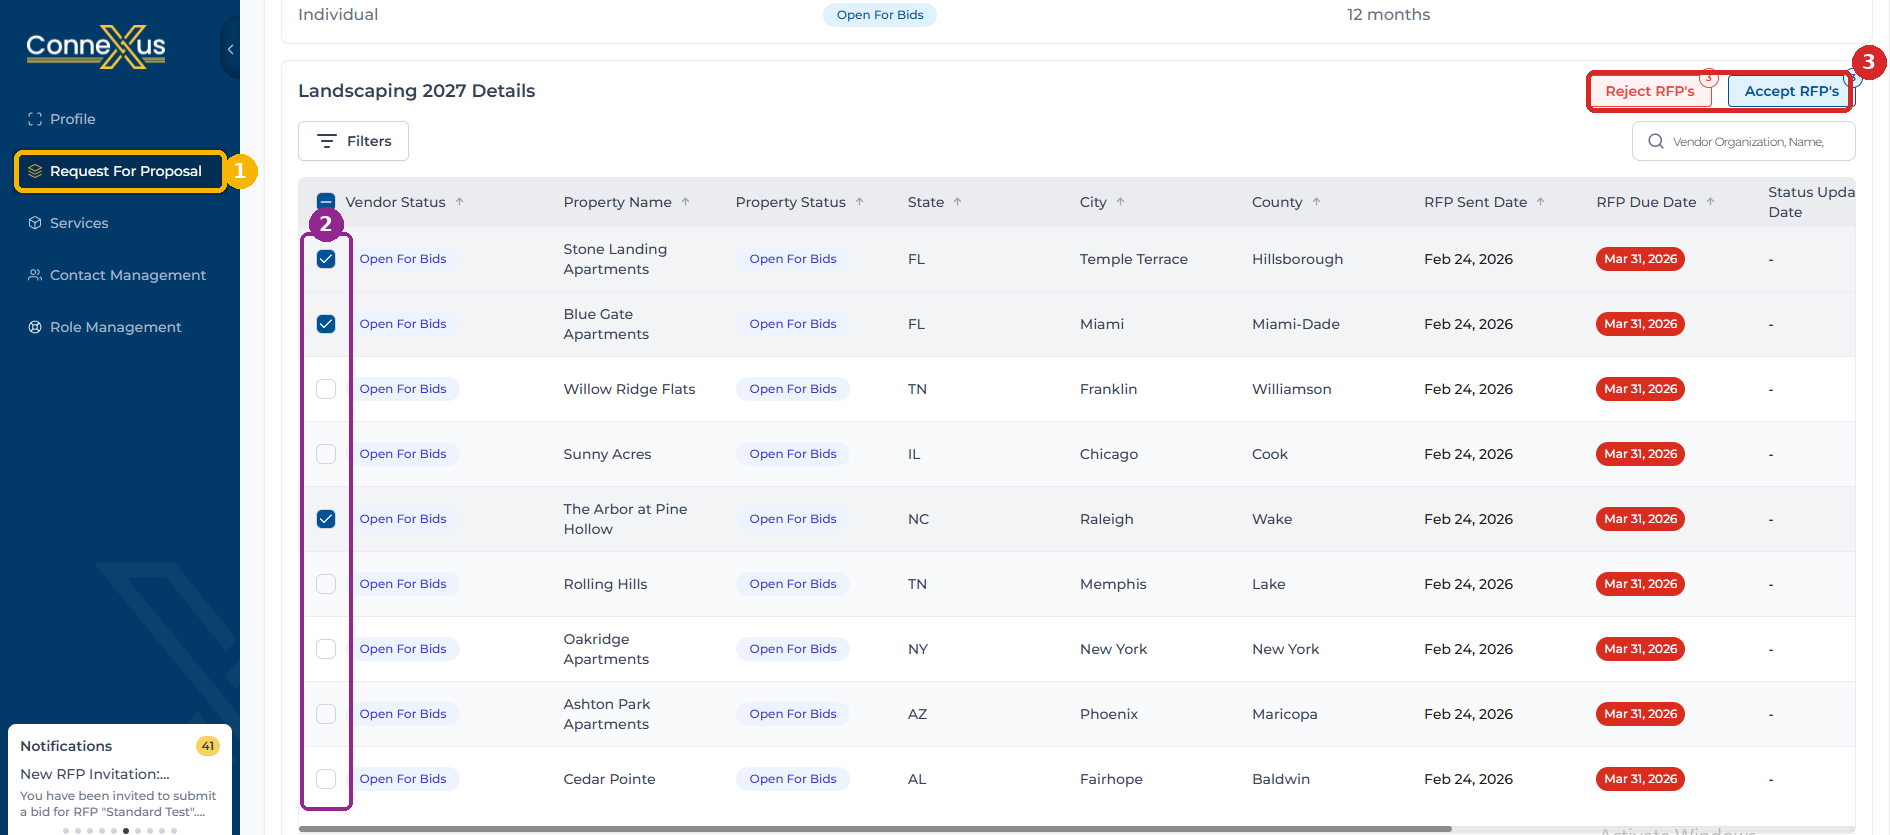
Multi-select properties, then Accept or Reject in bulk.
5. Confirming Pending Submission Status
After accepting, verify that the Vendor Status for those properties changes to Pending Submission.
This confirms the properties are accepted and ready for bid entry. Use it as your checkpoint before entering any pricing.
6. Reviewing Property Documentation & Launching the Bid Form
An RFP may include a single property or a portfolio of multiple sites.
To interact with all management tools and submission fields—Total Cost, Document Upload, and the three-dot action menu—locate the horizontal scrollbar at the bottom of the table and scroll to the rightmost edge of the screen.
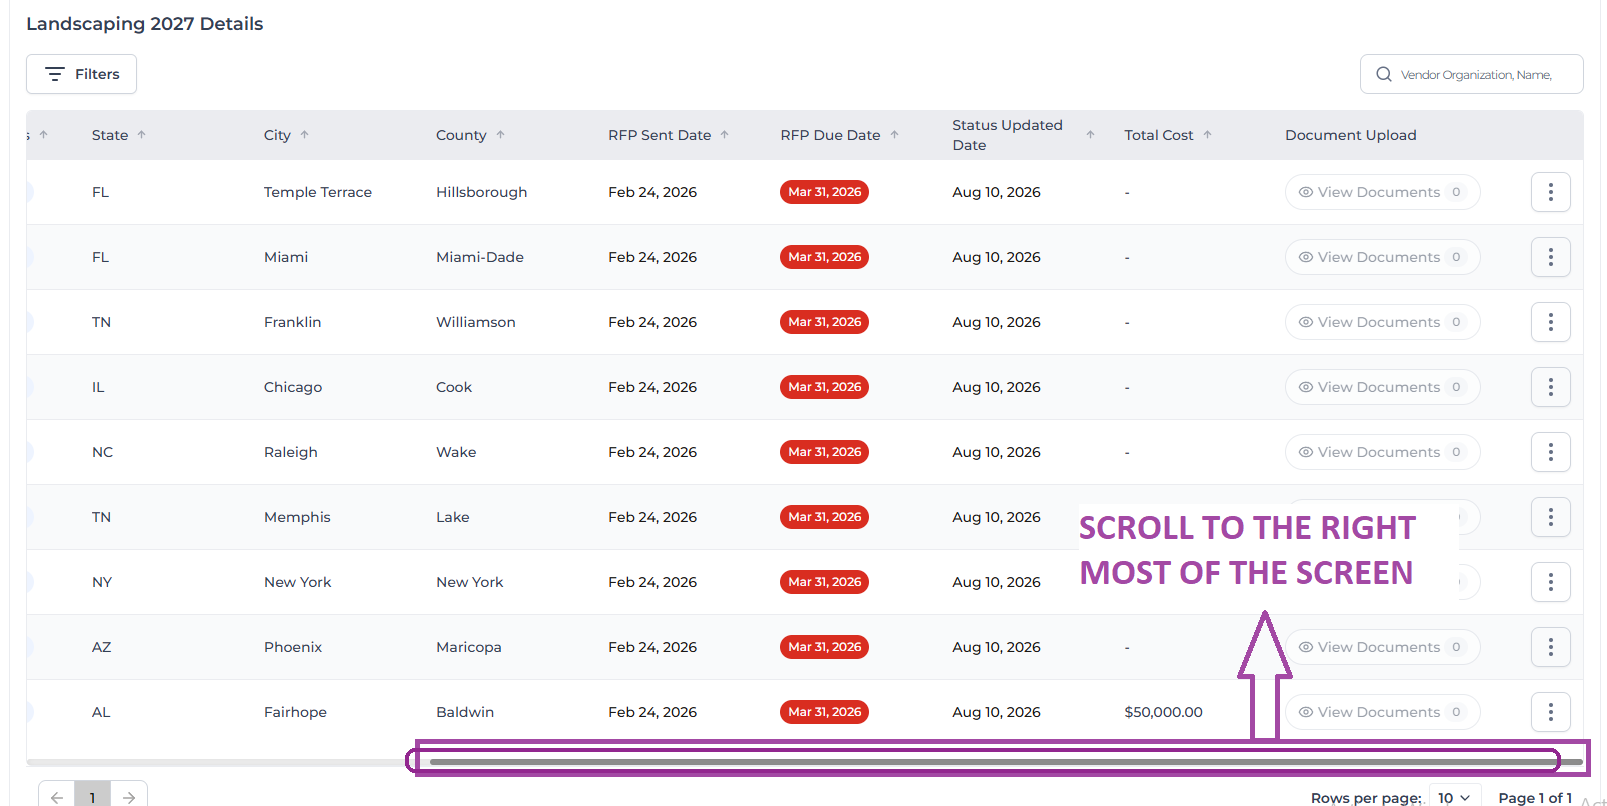
Scroll the table to the rightmost edge to reach the action columns.
Before placing a bid, review any supplementary files or requirements the client uploaded for a specific property. Open the three-dot menu on the right side of a property row.
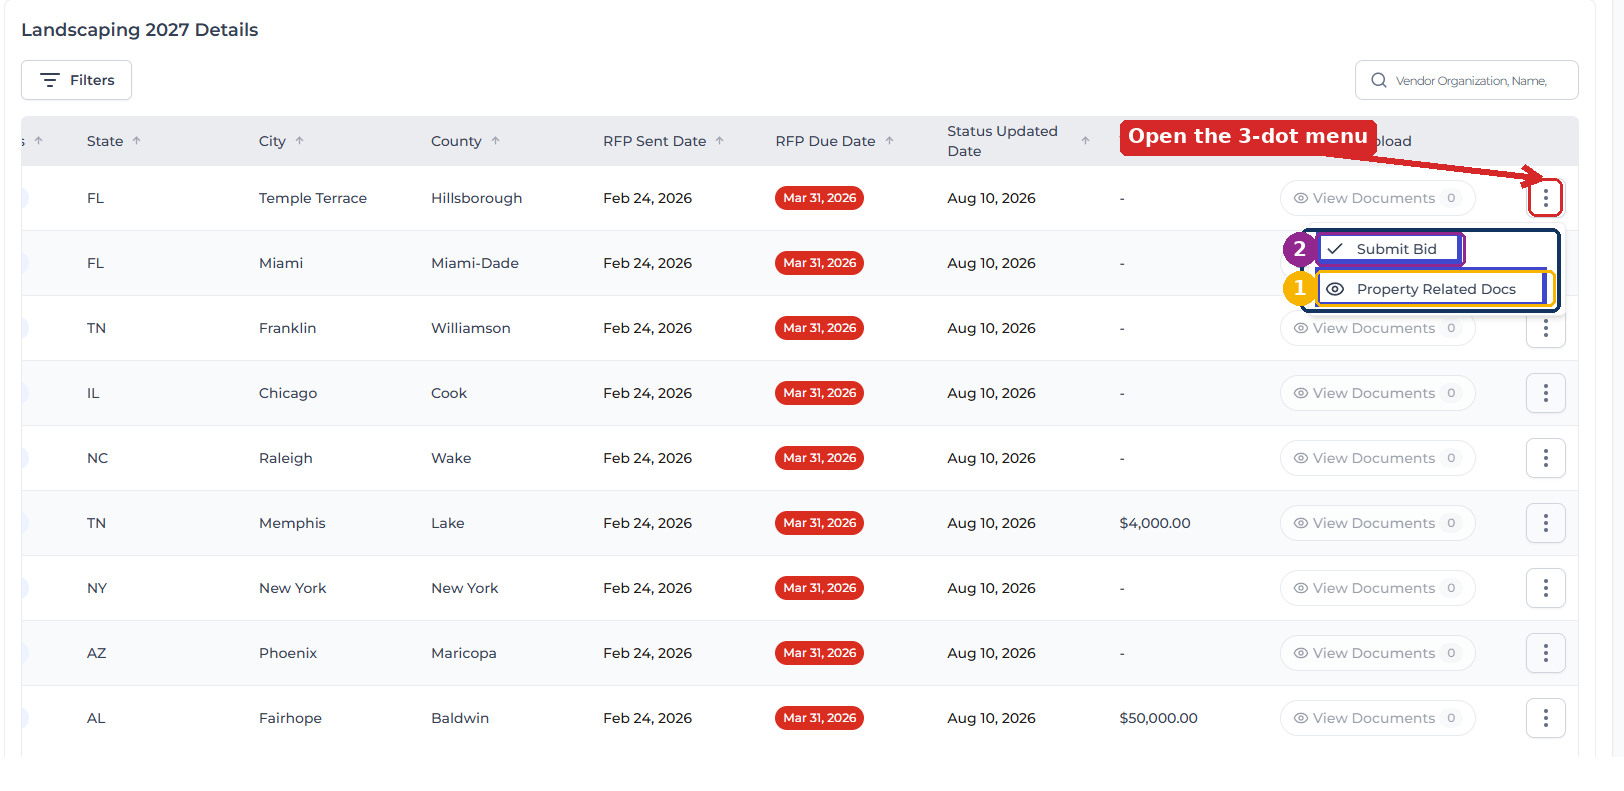
The three-dot menu: view property-related docs (SOW) or open submit bid.
Property-Related Docs (marked 1) — opens the detailed Scope of Work (SOW), site maps, or engineering requirements for that property.
Submit Bid (marked 2) — opens the formal pricing sheet (the Vendor Bid Submission page) for that RFP.
7. Entering & Saving Bid Details
On the Vendor Bid Submission page each accepted property has its own pricing row: Only properties with a total cost or attached file can be submitted.
Total Cost (marked 1) — enter your final, all-inclusive bid amount in the numeric field for each property.
Save each entry using the green check / tick control next to the field. If you navigate away before saving, the system warns you that unsaved changes will be discarded.
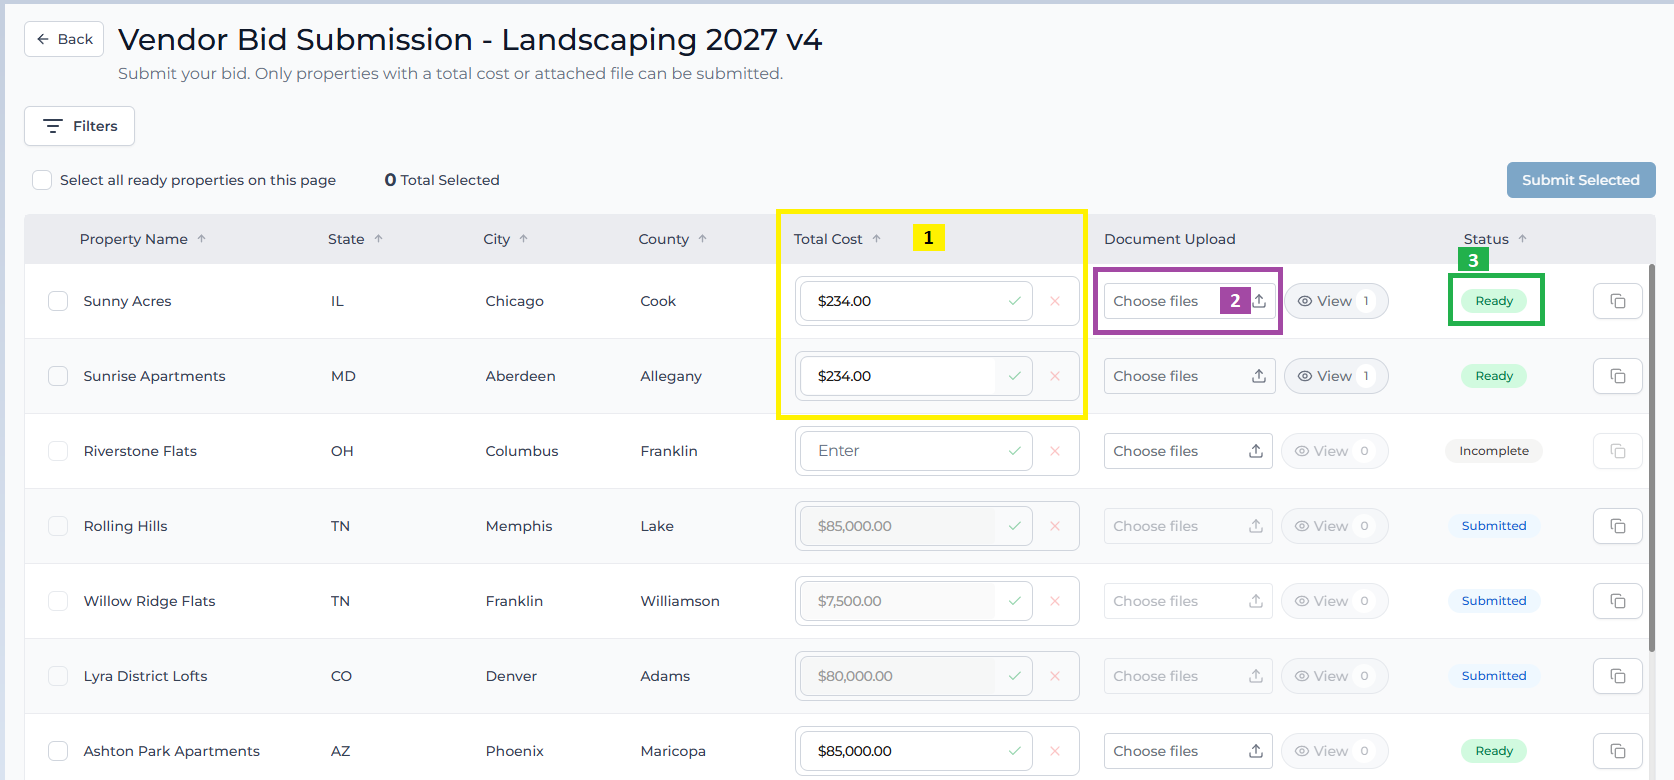
Enter the total cost, attach files, and save—the row then turns "Ready".
8. Uploading Documents & Reaching “Ready”
Document Upload (marked 2)—click Choose files to attach quote breakdowns, schedules, or compliance certificates specific to that property. Use View to review attachments before submitting.
Once a valid cost or file is saved, the property status (marked 3) changes from "Incomplete" to "Ready". Only "Ready" properties can be submitted.
9. Copying Bids Across Properties
When the same values apply to multiple sites, use the copy control on a property row to speed up entry:
Copy to All — applies the row's values to every accepted property.
Copy to Specific Properties — applies the values only to the properties you choose.
After copying, review the copied entries for accuracy and confirm whether the copy included uploaded files as well as values. Edit any row before submission if changes are needed.
10. Selecting Ready Properties to Submit
Tick Select all ready properties on this page (marked 1), or select individual Ready rows.
Check the Total Selected count (marked 2) so you know exactly how many properties will be included.
Only properties marked Ready are eligible — entering a bid on one property does not auto-populate the others. This prevents accidental submission of empty bids.
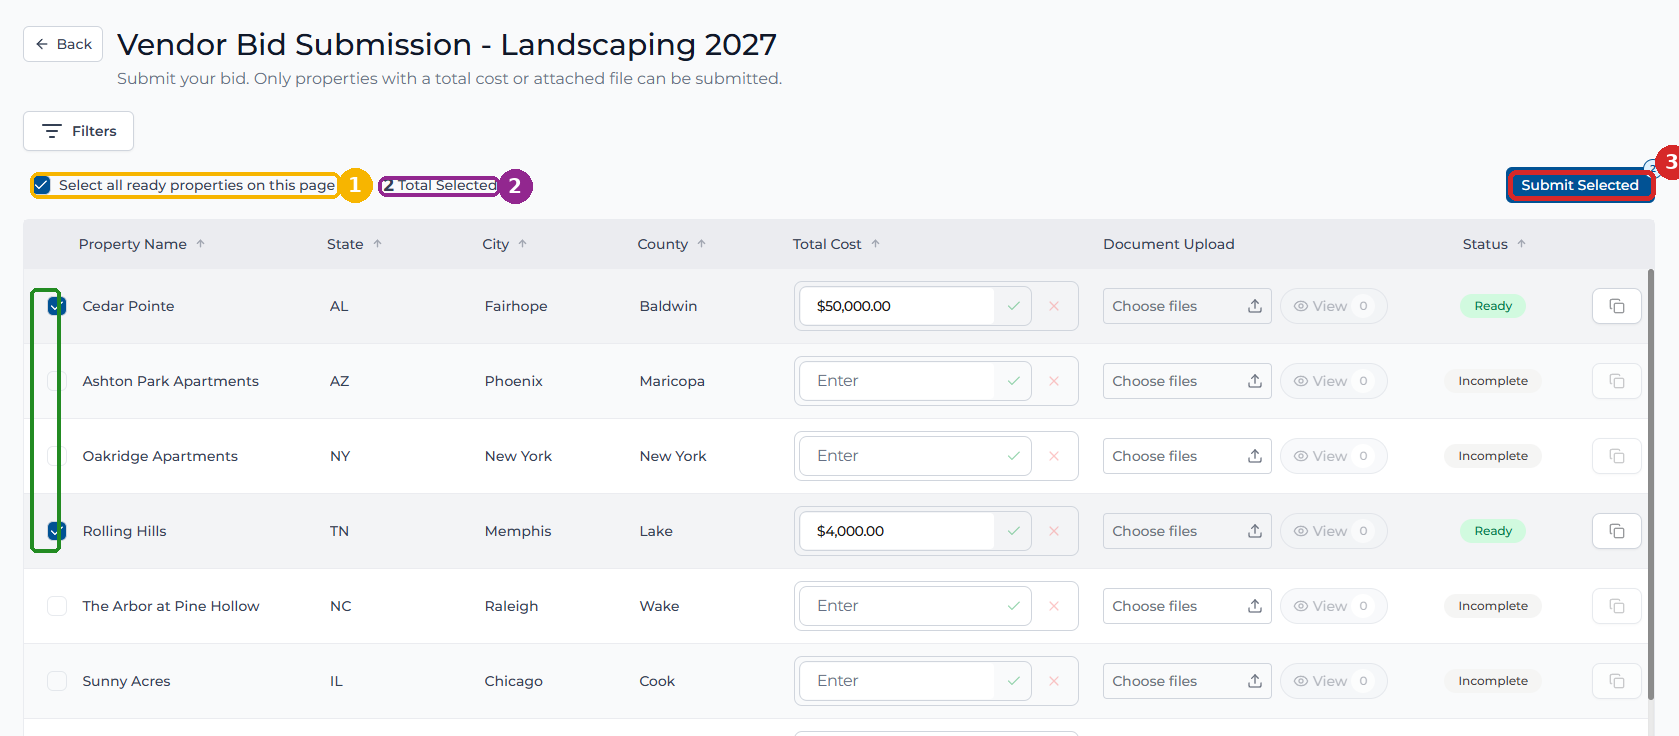
Select only the Ready properties and confirm the count before submitting.
11. Submitting & Editing Limitations
Click Submit Selected (marked 3) only after confirming the correct properties are ready. Incomplete properties remain unsubmitted and can be finished later from the same RFP.
After submission, the property status changes to Submitted, the cost field is locked/greyed, and the Submit Selected button is disabled for those rows.
Submitted bids become read-only. Changing a submitted cost later is a separate ticketed enhancement and may not be available yet—so make final edits before you submit.
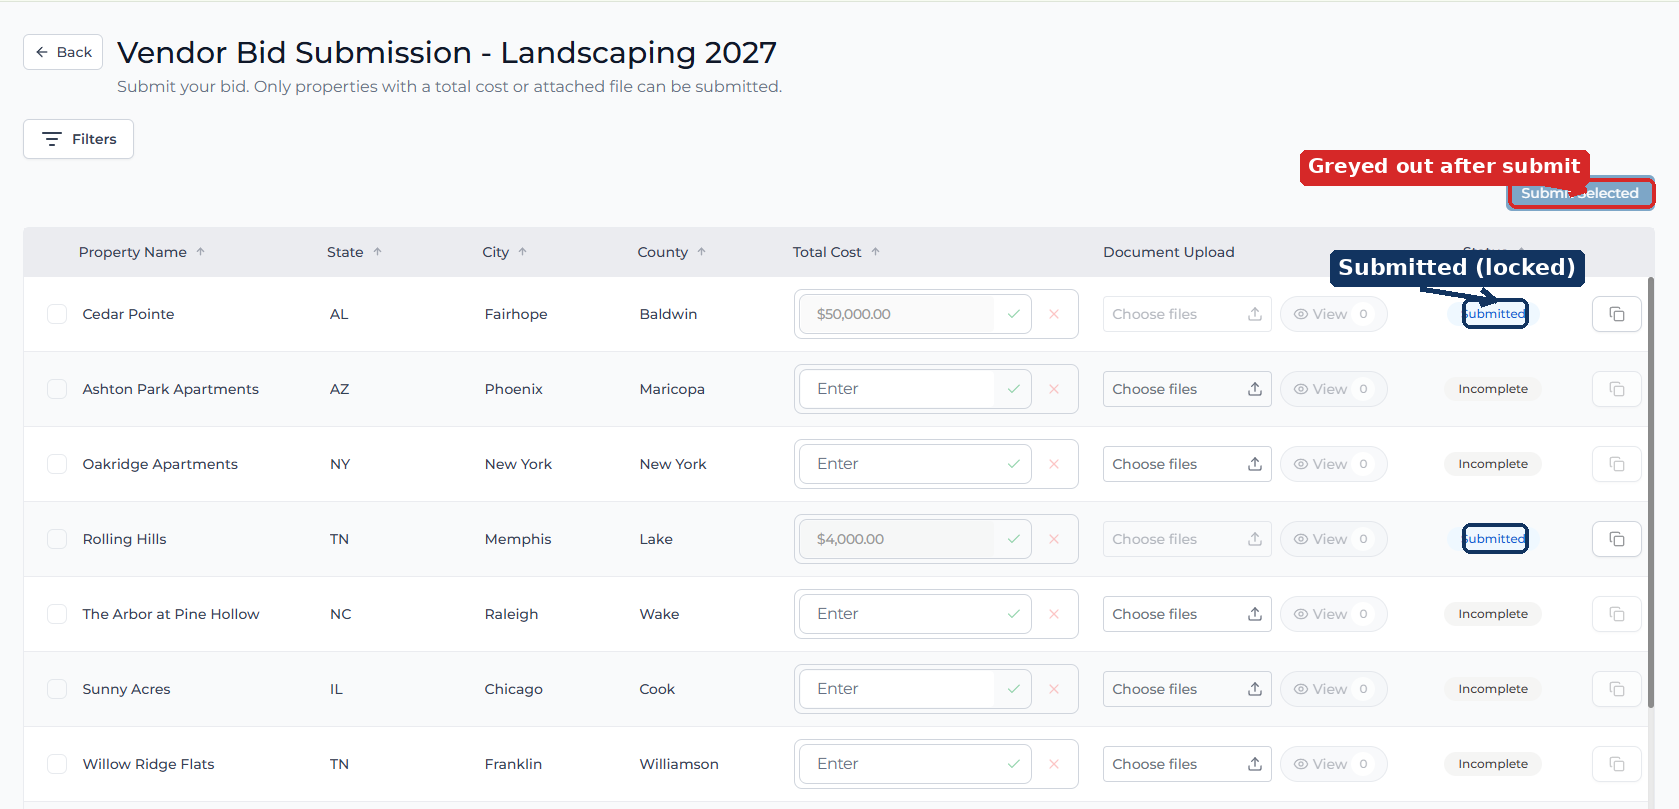
After submission, Cedar Pointe and Rolling Hills show "Submitted" and are locked.
.
Was this article helpful?
That’s Great!
Thank you for your feedback
Sorry! We couldn't be helpful
Thank you for your feedback
Feedback sent
We appreciate your effort and will try to fix the article