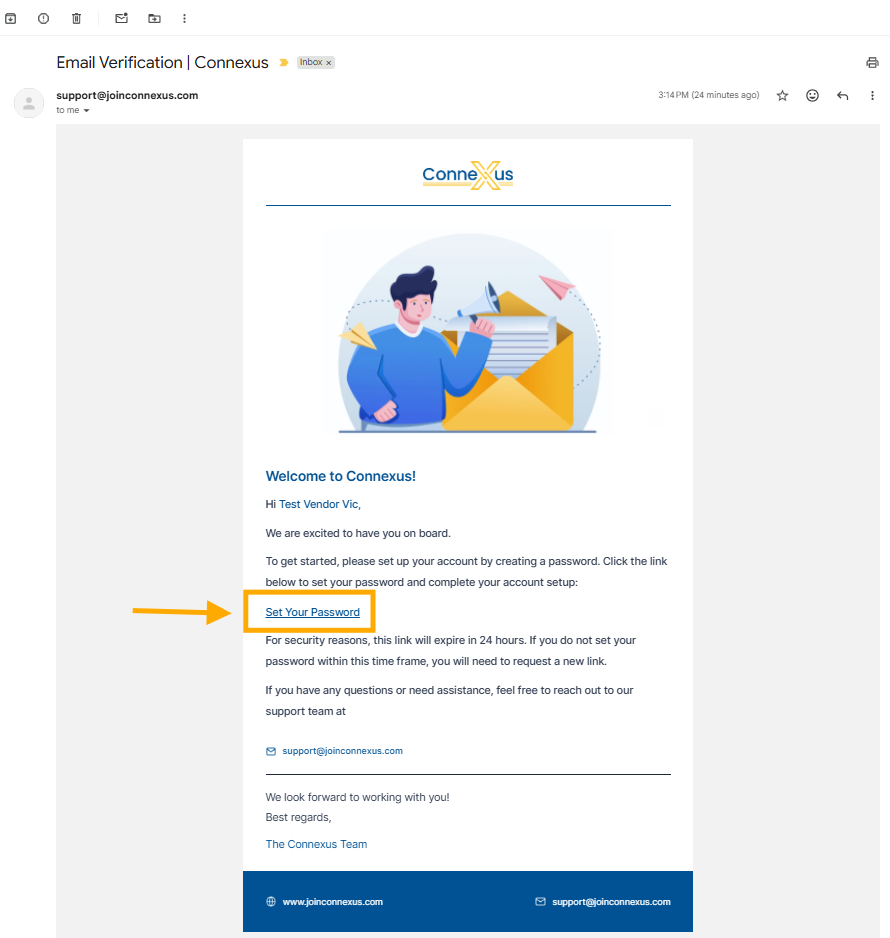
1. Activate Your Account: You will receive a Password Setup email. Click the link.
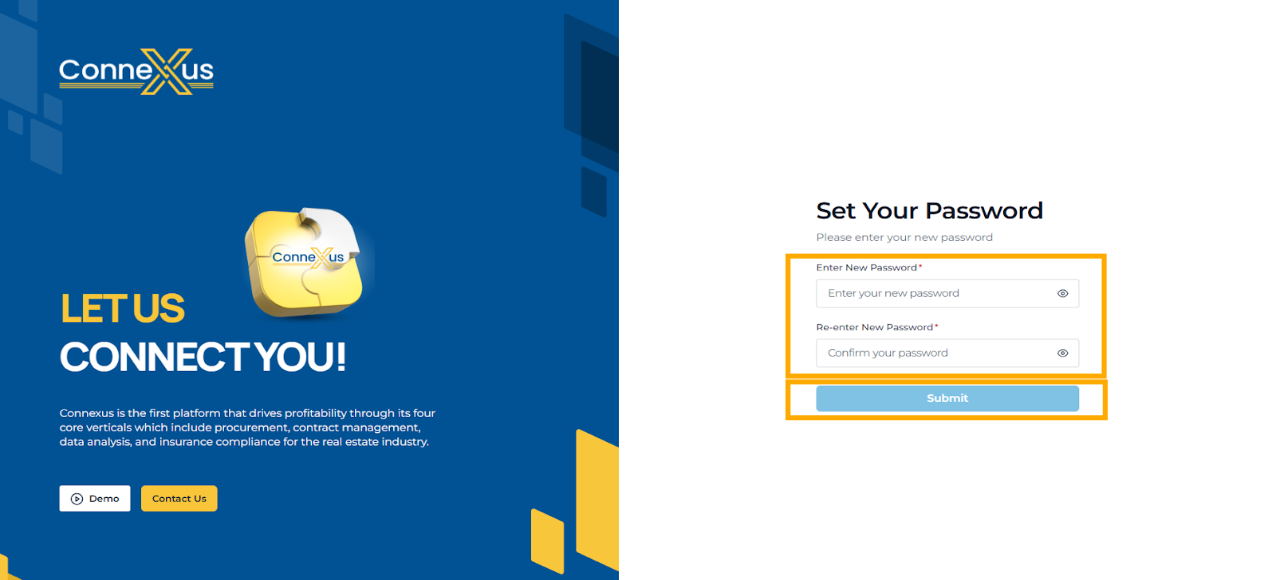
2. Create a password, then click Submit.
3. Log In
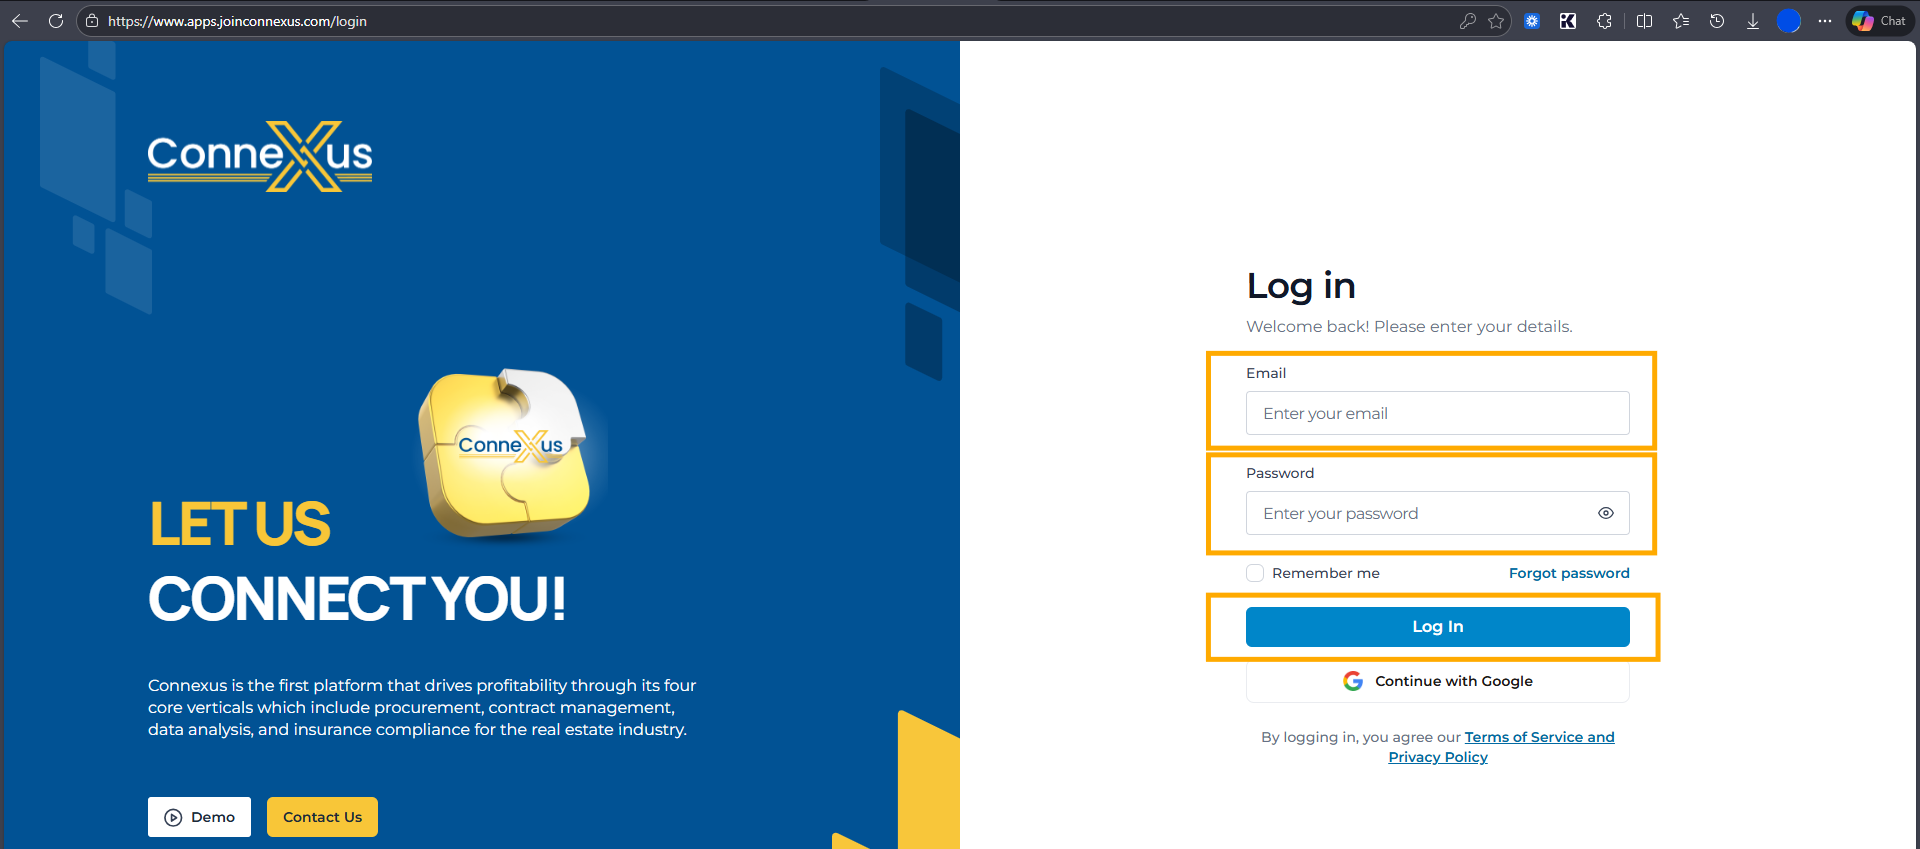
- Navigate to the login screen.
- Enter the email address that received the password setup link.
- Enter the newly created password.
- Click Log In.
4. Company Information
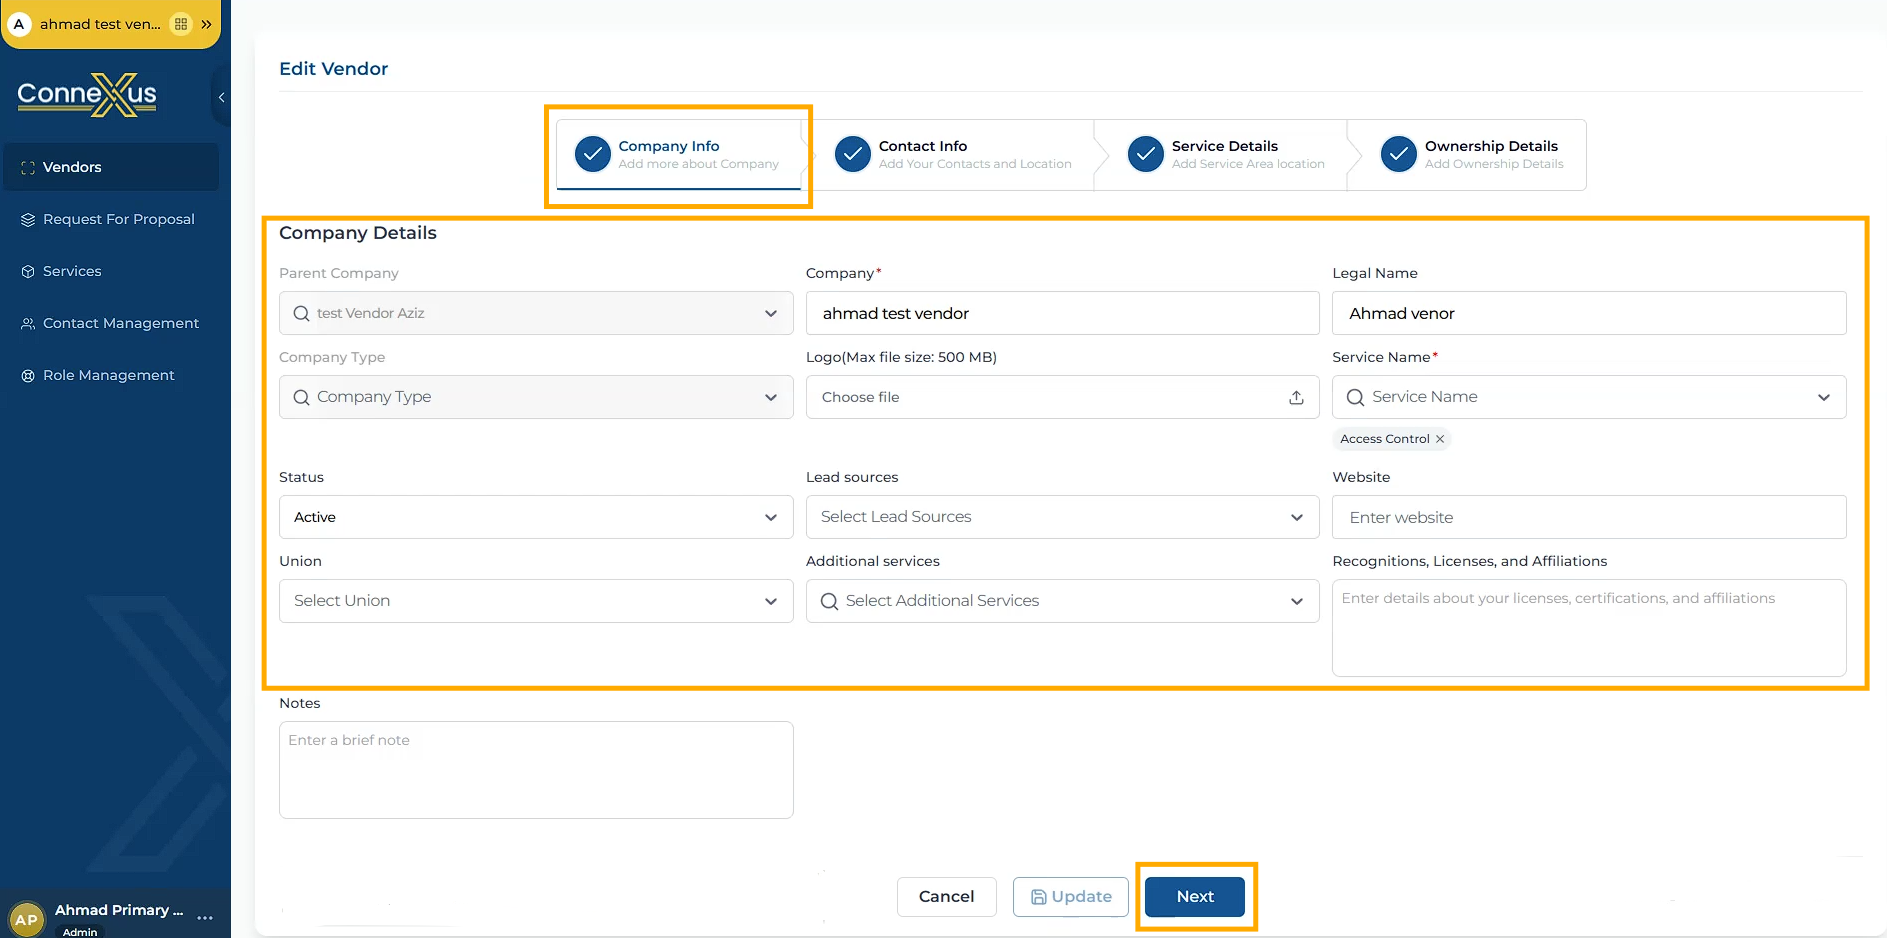
- When you first log in, you will see the screen below. It is key that all information is updated to the full extent possible on each screen.
- Review and update your Service Details to confirm every applicable service is selected. To ensure you receive all relevant RFPs, select all applicable individual and combined service categories your business offers. The system matches RFPs based on these selections.
- Click the “Next” button at the bottom of the screen to save your current progress and advance to the next section.
5. Update Contact Information
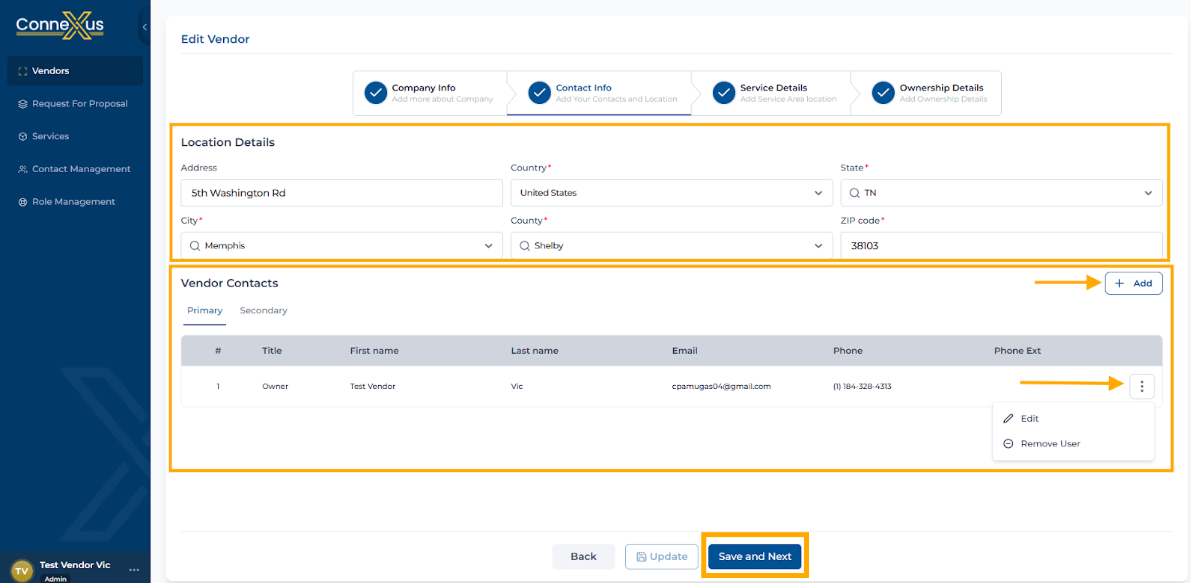
- In the Contact Information section, update your company location, including mandatory fields (*) for Country, State, City, County, and ZIP code.
- In the same section, you can also review and update the “Vendor Contacts.”
- You can edit or remove an existing contact by clicking on the three-dot menu and selecting Edit/ Remove User.
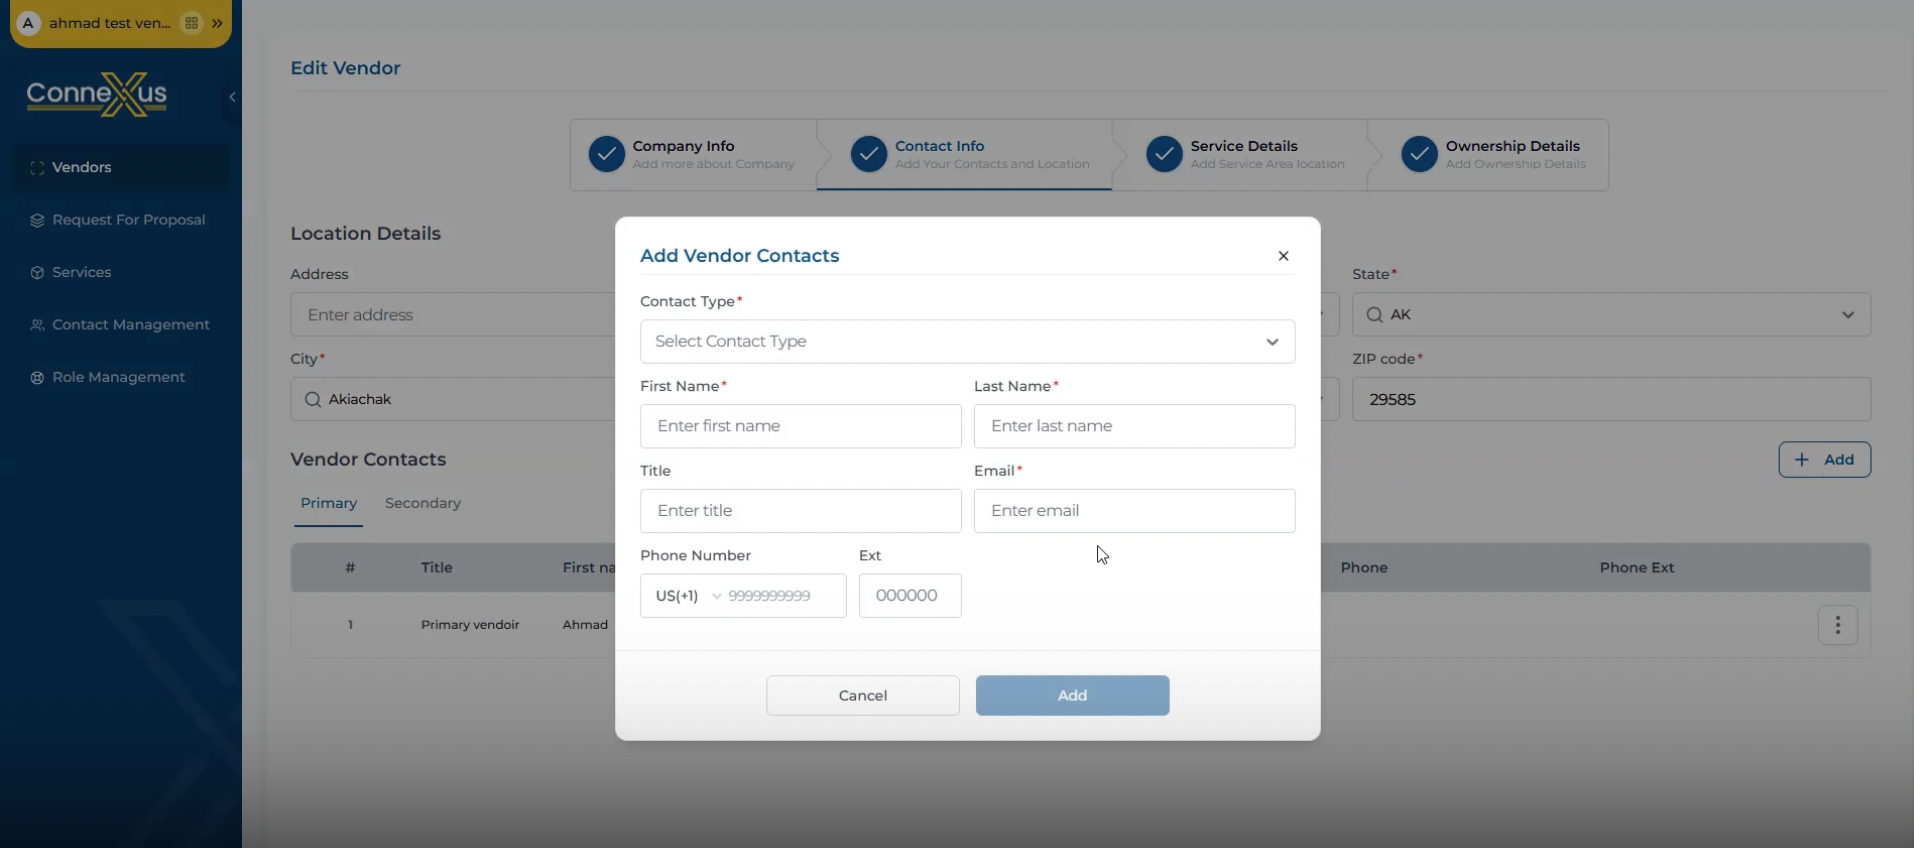
- You can also add another Contact by clicking on the + Add Button. Then provide the information below. Once all information is complete, click on the “Add” button.
- Note that RFPs are automatically sent to the Primary Contact listed on the account. Ensure the Primary Contact’s email address is accurate to avoid missing RFP opportunities.
- Once the company’s contact information is updated and complete, click “Save and Next.”
6. Update Service Area Details
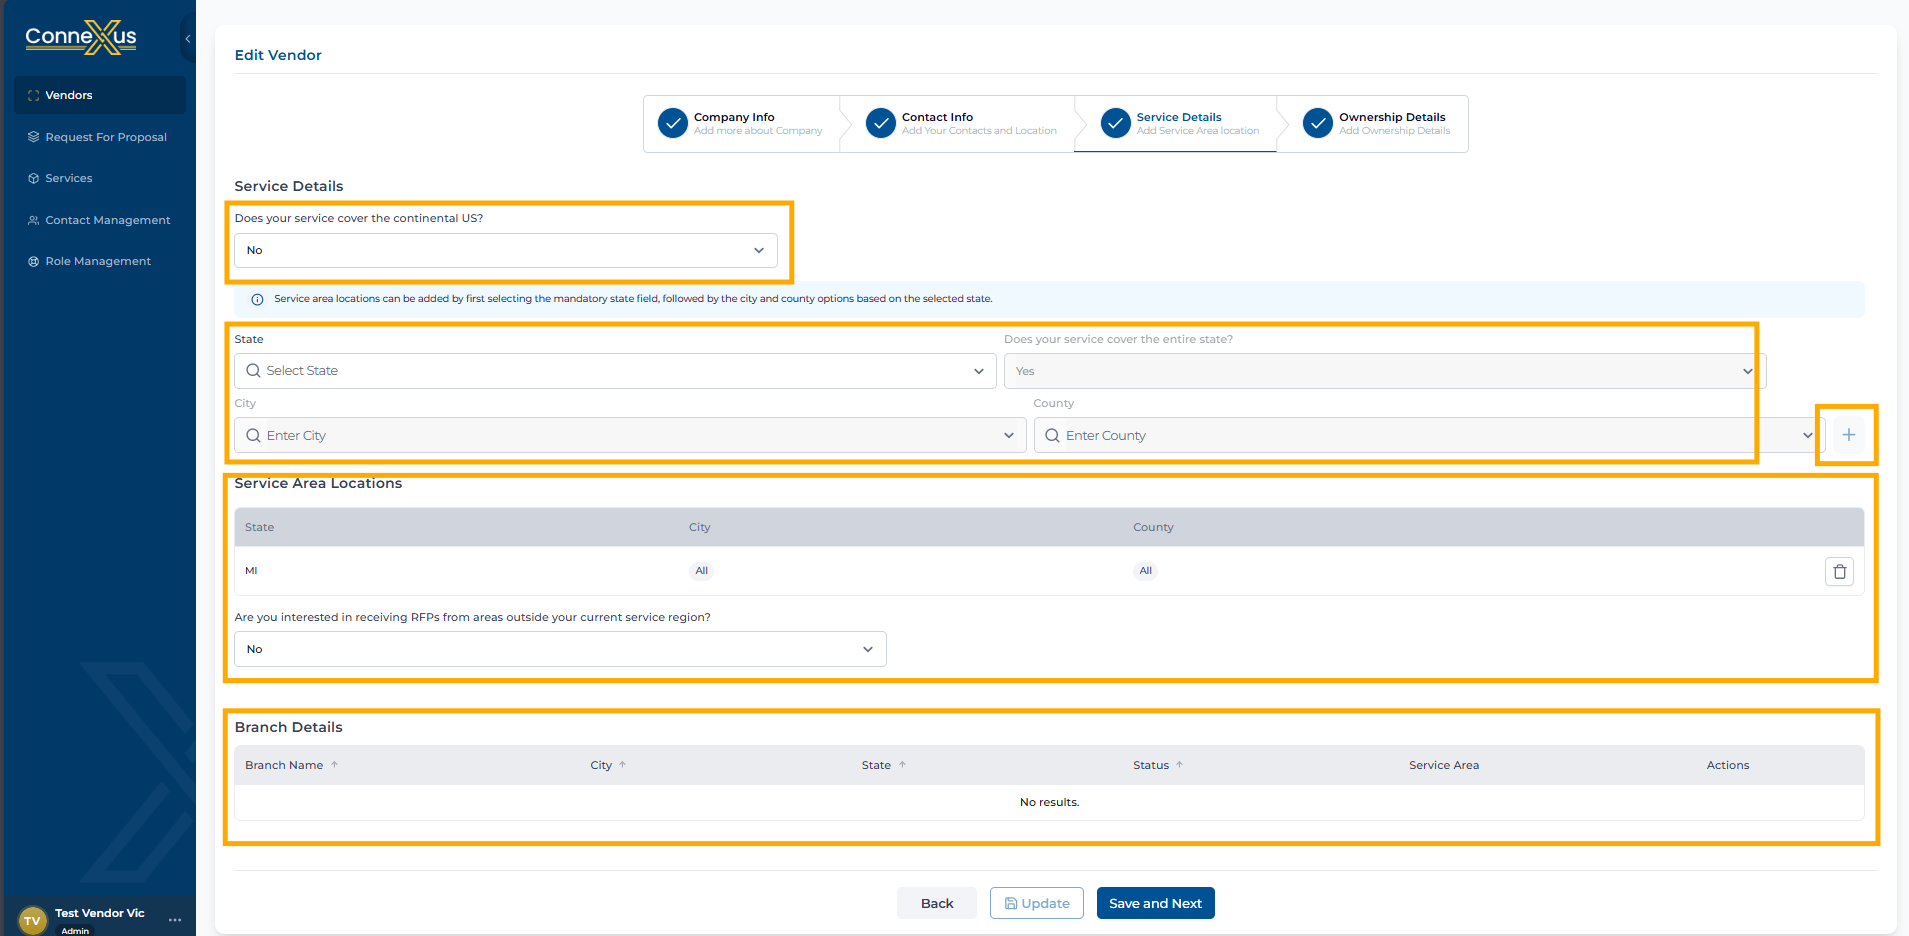
- Select “Yes” if your services cover the entire Continental U.S., then choose “Save and Next”.
- If “No”, then choose the State(s) you service. Then select whether you service the entire state, or by specific cities or counties. This information ensures you receive RFPs for properties in those locations.
- Click the plus (+) icon to save it as your service area.
- Continue to add additional states if required.
- Then choose “Save and Next”.
7. Provide Ownership Details
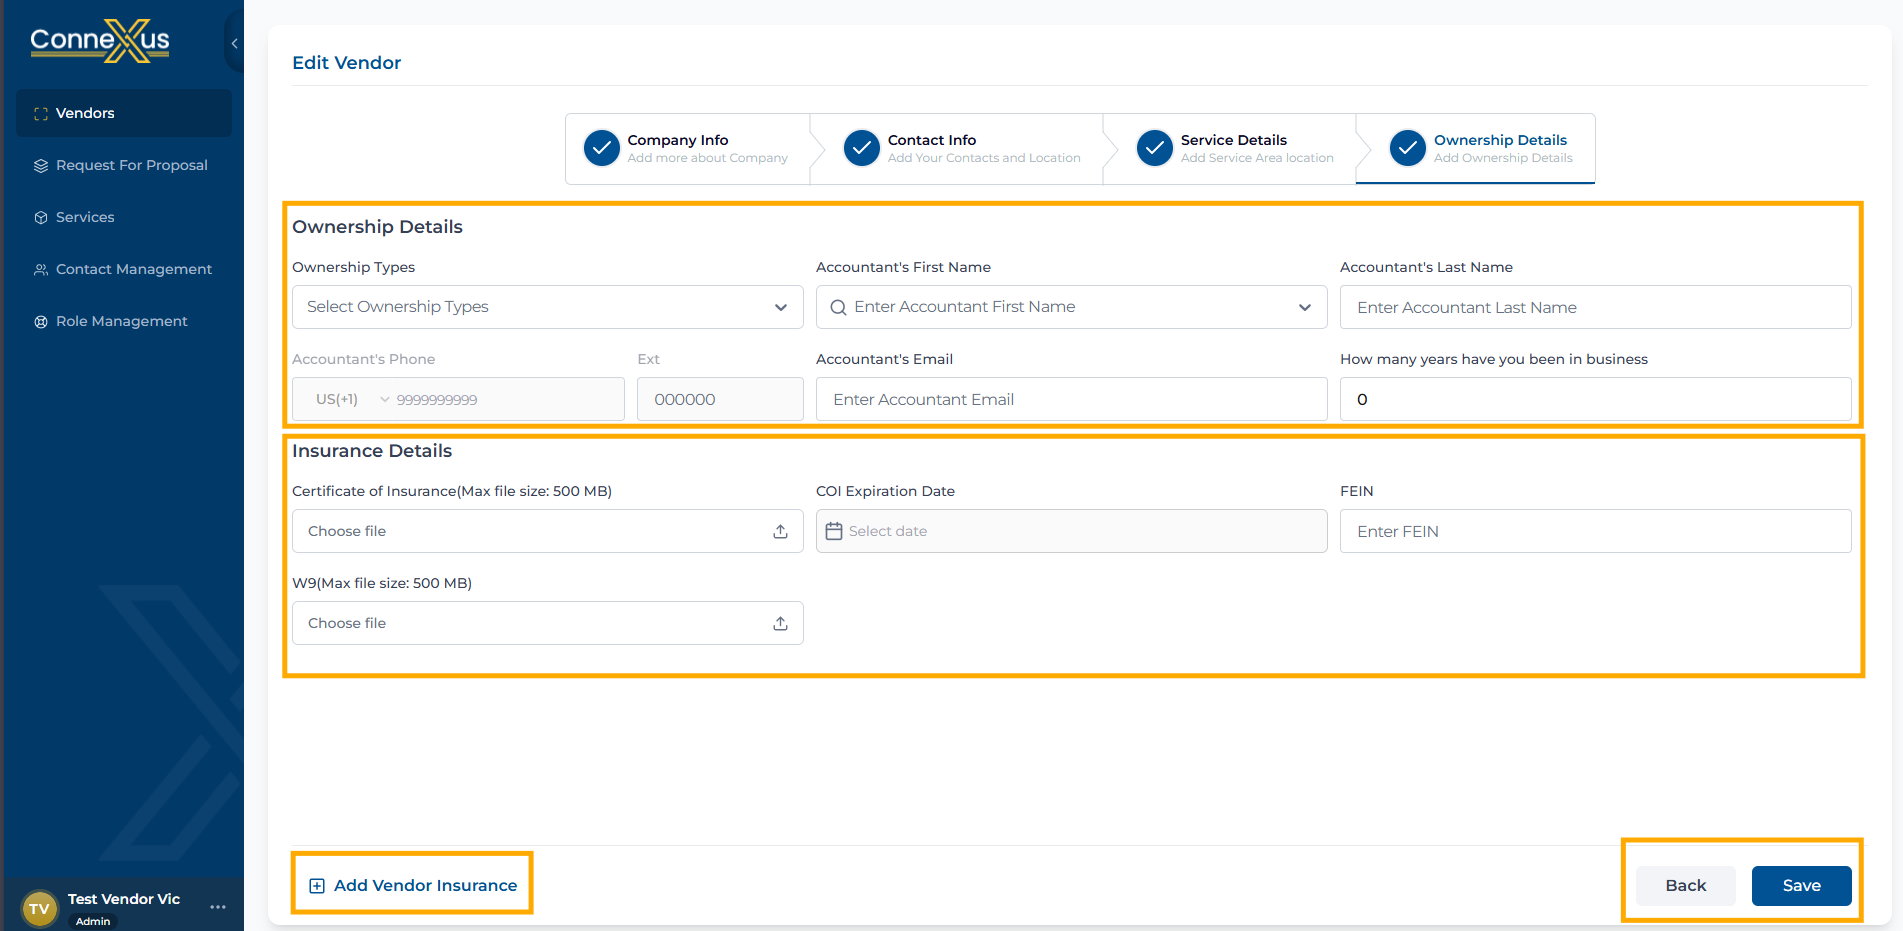
- On the final screen, please update the ownership information, including adding your COI and W9, then click “Save”.
Your vendor profile setup is now complete!
Was this article helpful?
That’s Great!
Thank you for your feedback
Sorry! We couldn't be helpful
Thank you for your feedback
Feedback sent
We appreciate your effort and will try to fix the article